
Interior Drain Tile Installation
A perimeter drain collects wall runoff and carries it into the sump basin.
White powder returning through paint tells you moisture is still crossing the masonry. Minneapolis PureSeal handles basement wall waterproofing by treating the wall and giving collected water somewhere to go. We explain when concrete waterproofing needs a membrane, joint work, or drainage beneath the floor.
Call (612) 457-0860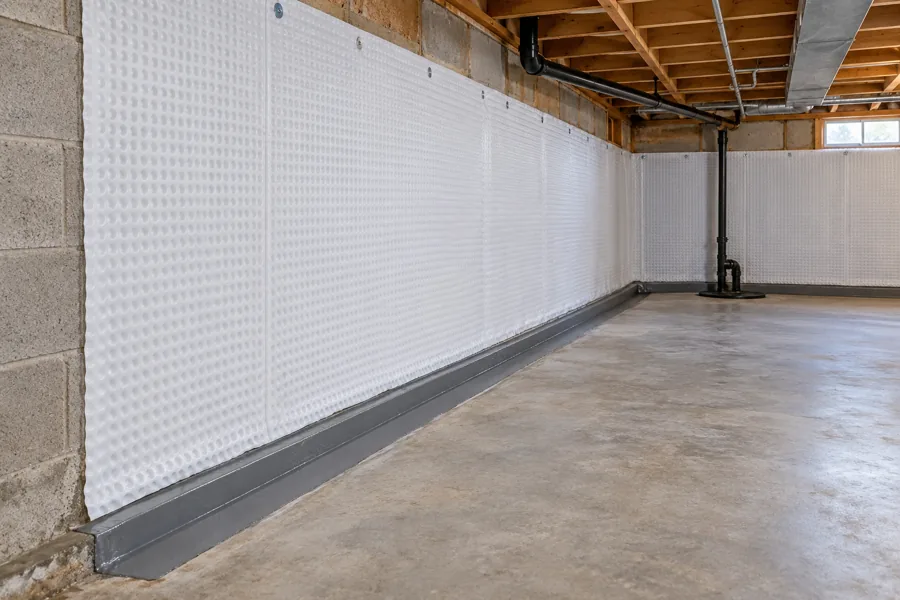
A poured wall presents a different water path from hollow block or fieldstone. We brush away loose deposits and examine joints, cracks, and earlier coatings. Water sometimes travels behind paint before showing along the bottom edge. The table explains why one wall treatment does not fit every basement.
| Wall Type | What Fails | Treatment |
|---|---|---|
| Poured concrete | Cracks, penetrations, and gaps beneath earlier coatings | Prepare concrete; seal defined openings; fit membrane where broader moisture needs collection |
| Concrete block | Leaking mortar joints and water inside hollow cores | Repair leaking joints and connect wall drainage to a perimeter collection route |
| Brick | Worn mortar and moisture moving through porous masonry | Repair joints with compatible materials and plan moisture collection |
| Fieldstone/rubble | Irregular joints and loose or washed-out mortar | Repair sound masonry joints; choose a drainage treatment around the uneven surface |
Sealing block walls begins with finding where water enters and where it leaves the cores. A dark patch halfway down the wall is not always the original opening. We follow the wet joints toward the footing and inspect the floor edge. That helps connect wall work to the collection route below.
A surface sealer does not remove groundwater pressure behind the wall. Fresh paint also hides the water marks we need to follow. If water pushes through several joints, another coat leaves that pressure in place. We explain where sealing stops and a collection system needs to begin.
Interior waterproof membrane installation creates a surface that directs wall moisture downward. The bottom edge needs a connection to interior drain tile rather than an uncollected floor seam. We fit the membrane around penetrations and leave inspection access where needed. Drainage below the slab then carries that collected water toward the sump.
Before covering the wall, we discuss anything already attached to it. Shelves, framing, and utility lines change how the membrane reaches corners and joints. The plan shows what gets moved and what stays accessible. That keeps a finished panel from hiding an opening that still needs attention.
Across Minneapolis, older brick and stone basements appear in Longfellow, Powderhorn, Nokomis, and Northeast. Worn mortar lets water cross several joints instead of one clean crack. We trace those joints before choosing patch materials or a membrane. The uneven face of a stone wall also changes how drainage gets fitted.
In 1940s–50s block-wall homes, water collects inside hollow cores and emerges near the floor. That hidden route explains dampness appearing below an apparently dry upper wall. After spring thaw, efflorescence marks where moisture evaporated and left salts behind. We compare those deposits with active wet spots rather than painting over both.
A clear floor edge makes this visit more useful. Move boxes and removable shelving without stripping paint or applying another sealer. Pictures taken during thaw show which joints darkened first. Those clues help connect the masonry work to the water outside.
Wall length, height, material, and access all change the amount of preparation. Loose paint needs removal before new materials attach to the surface. Stone joints take different work from a flat poured wall. We list that preparation separately from membrane installation and any drainage connection.
Finished framing and pipe runs also affect access along the bottom edge. Tell us about appliances or storage that block the damp area. The written price names the wall sections, materials, and cleanup included. Call to discuss your basement rather than applying a square-foot guess to unseen masonry.
Water rising through the middle of the floor needs a drainage check. A single leaking line in poured concrete points toward foundation crack repair. We also test the sump pump when a full basin backs water into the collection system. A wall coating will not correct those separate problems.
A membrane changes how wall moisture reaches the room instead of repairing paint. We first remove loose material and trace the wet joints underneath. The membrane then directs collected moisture toward the drainage connection below. Any exposed masonry outside that treatment still needs its own moisture source traced before repainting or finishing.
Leave permanent framing in place until we discuss how the wall will be reached. Move loose boxes and photograph the wet edges beside finished panels. We explain which sections need opening and why that access matters. Cutting a whole room apart before the visit creates work that the repair might not require.
Loose or missing mortar needs attention before a membrane covers the wall. The membrane collects moisture; it does not rebuild damaged joints behind it. We clean the exposed joints and explain the mortar work included. That preparation gives the wall treatment a sound starting surface and keeps loose material out of the drainage edge.
Photograph the first damp joints, the floor seam, and any returning white deposits. Include a wider picture showing windows and pipe openings near the stain. We use that sequence to follow moisture across the wall. A dry-day visit still reveals loose paint and mortar, but wet-weather pictures show where the leak started.
Homes in the communities below include poured walls, block basements, and older masonry. Tell us which surface stays damp and what covers it now. We use those details to plan access without guessing from a street name. Photos behind shelving help show the wall before your visit.
Describe the damp wall, peeling paint, or returning white deposits. We will discuss the wall material and the next step for controlling moisture. Your written plan explains the membrane, preparation, and drainage work before installation starts.
Minneapolis PureSeal
Minneapolis and surrounding area
contact@waterproofingminneapolis.comMonday through Friday, 8:00 AM to 5:00 PM
Emergency calls: available 24/7