
Basement Leak Repair
We seal traced openings around pipes, joints, and other local entry points.
A musty room without a visible puddle still leaves clues. Minneapolis PureSeal starts a waterproofing inspection with the walls, floor edges, and route water takes outside. We follow stains and equipment behavior before writing a plan that names the fix and price.
Call (612) 457-0860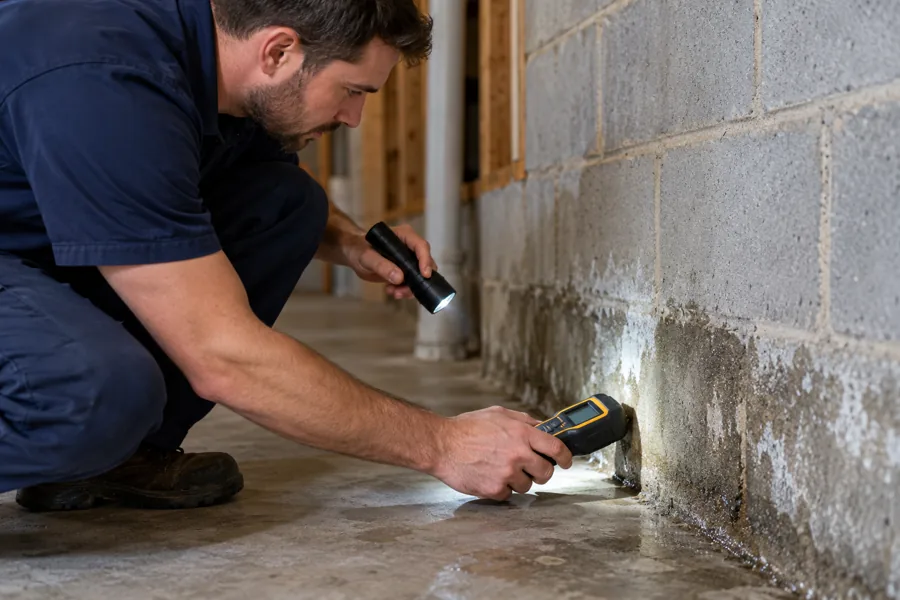
A basement moisture inspection follows connected parts of the house instead of one damp patch. We compare the wall marks with the floor edge and outside runoff. Pump behavior adds another clue when water collects beneath the slab. The checklist shows what we look at before recommending sealing, drainage, or equipment work.
White deposits, peeling paint, and dark masonry show where moisture has moved. We compare those marks with nearby joints and previous coatings. The wall material changes how a leaking section gets treated.
Water along the cove joint points toward pressure beside or beneath the footing. We trace the wet length and its connection to the sump. A puddle away from the wall needs its source followed separately.
A defined wall line differs from a gap around a pipe sleeve. We inspect earlier patches and photograph the actual opening. Signs of wall movement lead to a separate structural review before sealing.
We run the float switch and watch how water leaves the basin. The check valve and outside pipe need attention alongside the motor. A full basin does not always mean the pump itself has failed.
Leaves, sediment, and snowmelt gather below the surrounding yard surface. We inspect the drain route and the marks beside the frame. The cover gets discussed alongside the outlet rather than as a substitute for drainage.
Surface slope and roof-water outlets change how much runoff reaches the buried wall. We follow extensions beyond their ends and look for returning flow. That outside route belongs with the indoor observations in the repair plan.
Take a wide photo before wiping away water or moving the wet boxes. Then photograph the first mark on the wall or floor. We use that sequence to find the basement leak source before later spreading hides it. Keep the original images so the timing stays attached to each view.
Write down when the leak starts and what the weather was doing. Include how long the pump runs and whether the basin empties between cycles. A short video captures a clunk or repeated motor starts. Those observations help connect the sound to the water path during the visit.
Move loose storage away from the wall without entering standing water. Leave permanent framing, wiring, and pump connections in place for discussion. We explain which finished surfaces need opening before anyone removes them. New paint or sealant hides the marks needed to trace the existing leak.
Your written plan names the proposed fix and its price. We connect each repair to the opening, collection route, or equipment fault it treats. That might mean pipe sealing, drain tile, or a pump switch replacement. The plan explains those jobs separately when more than one water path exists.
A wet basement assessment should also explain what the proposed work will not handle. Groundwater beneath the slab differs from a plumbing leak overhead. Wall movement needs a separate structural review before water sealing is chosen. We explain any referral instead of putting unrelated work into a waterproofing price.
Ask which surfaces will be opened and how cleanup will happen. The written plan should name access work as well as the installed materials. We also show where inspection or pump access remains afterward. That gives you a practical picture of the work before scheduling begins.
In Minneapolis, a visit during or just after thaw shows active water routes clearly. Winter photos should include ice around discharge outlets and snow inside window wells. Stay away from unsafe footing or electrical equipment while taking those pictures. We use them to connect outdoor blockage with indoor wet marks.
During spring rain, photograph downspouts, standing yard water, and the first damp floor edge. Late March melt sometimes continues feeding the ground after the snow looks gone. A dry-day visit still reveals old marks and pump connections. Your wet-weather pictures show which of those older clues became active again.
Active water makes the route easier to see, but a dry visit still reveals useful marks. We read stains, old patches, wall materials, and the sump connections. Photos from the last wet day show which marks became active first. Tell us the timing so the discussion follows that event rather than only the dry wall.
Leave a visible section of the deposits and photograph the surrounding wall. We compare those salts with peeling paint, mortar joints, and active dampness nearby. Cleaning everything removes part of the trail before the visit starts. Moving loose boxes helps more than repainting or coating the area while the source remains unclear.
Outside runoff and discharge help explain what happens at the indoor wall. We look at downspouts, window wells, grading, and the sump outlet when access permits. Photographs help show a route blocked by snow or an inaccessible side yard. Tell us about gates and stored items so the visit reaches the relevant areas.
The plan should name the water entry route and the work proposed for it. We describe the materials, access, price, and cleanup included in that job. Separate leaks receive separate explanations instead of being hidden under one broad label. Ask where collected water will leave and which parts will remain accessible after installation.
Call to discuss the visit and any inspection details before scheduling. Tell us the basement layout, visible moisture, and access restrictions. We will explain how the visit works and what information to have ready. No repair price is assumed before the water route has been traced.
Water following a supply pipe or appliance cycle needs plumbing attention. We also pause when electrical hazards or wall movement block safe waterproofing work. Basement leak repair follows after the water source is understood. A crack-sealing discussion does not replace a separate structural review.
Visits include Longfellow, Powderhorn, Nokomis, Northeast, and the nearby communities below. Tell us what changed after rain, thaw, or the last pump cycle. Wider photos show the room and nearby openings before close-up stains are discussed. That history helps us start at the source rather than the largest puddle.
Describe the first sign of moisture and when you noticed it. We will explain what to photograph and how to leave the wet area visible. Your written plan connects the observed water path to a proposed fix and price.
Minneapolis PureSeal
Minneapolis and surrounding area
contact@waterproofingminneapolis.comMonday through Friday, 8:00 AM to 5:00 PM
Emergency calls: available 24/7